SUMO-X VTX 1300 - VTX 1800 Fender Installation Instructions
Before you begin, make sure your motorcycle is securely blocked and strapped for safety reasons. The frame should be about 6 ½” from the work surface to insure an easy installation.
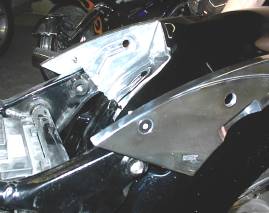
Step 1. With necessary factory components removed, mark and cut the frame just behind the shock mounting hole about 1” from the center of the hole.
Photo 1

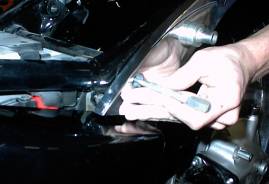
Step 2. Slide fender and strut assembly into place as shown in photo 2.
Photo 2
Step 3. Install Shock mounting bolt through large hole in strut into the shock bolt hole in the frame and finger tighten.
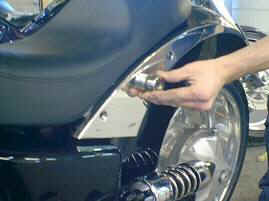
Adjust rear of fender up or down until the bottom of the struts appears parallel to the factory side covers. Check the seat and side covers at this point. Also check fender and tire clearance, loosen shock studs and re tighten to hold the fender in place and re-adjust if nessicary. Use a punch (preferably a transfer punch) to mark the front hole location in the frame. See photo 3.
Photo 3
Remove fender assembly and drill a 5/16” hole in both sides of the frame. Reinstall fender assembly and install the front and shock mounting bolts through the frame, install washers and nuts. Using thread sealant is recommended. (This can also be done with the fender on if extreme car is taken.)
For those running air ride shocks we suggest you save this operation for last. Once the bike is assembled with wheel and shocks on, setthe bike down on the ground, cycle your air ride up and down a few times to make sure both shocks are now settling at their lowest point. You can then lift the tail of your fender and gain a little bit of additional clearance on the tire if needed. You must keep in mind though that the leading edge of your fender struts are machined to run parallel with your side cover. Too much adjustment in the fender will throw this spacing off. You can though gain a small amount of lift in the tail of your fender and the side cover spacing still appear fine. Stand back take a look and make your own call on it. Once you are happy with placement then mark and drill your forward strut holes.
Step 4. Install shock bolt bezel as shown in photo 4.
Photo 4
Step 5. Tighten both the shock mounting bolt and the front strut bolt. Install shocks per shock instructions.
Step 6. 1300 Models will require that you cut some of the foot peg bracket for fender clearance.
Cut only the sections shown in photos 5 and 6.
Photo 5
Right 1300 passenger peg bracket cut
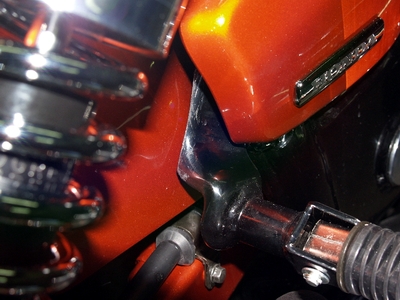
Photo 6.
Left 1300 passenger peg cut.

Step 7. Install seat and side covers, Double-check all fasteners for proper torque per the Honda service manual.
Welcome to the Phatland!
~Ride On!
RIDE ON!
Phat Parts Outlet © 2010 All Rights Reserved
Arizona Phats™ AZ Phats™ StumpWerx, Inc.™ Gateway Xtreme LLC™ AZPhatShop™ Phat AZ™ PhatPartsOutlet™